I am a picture-a-holic, admittedly, and any one who really knows me can attest to that. When we moved into our house I wanted to hang picture frames everywhere I could, especially in the hall way that leads to the bedrooms. I thought it would be like a walk down memory lane every time you walked down the hall. But, Greg wasn't too keen on the idea of having holes in the wall and it kinda would "clutter-up" the place. So I came up with an easy solution to have the pictures I wanted in the hall way with out it looking "cluttered-up" and putting holes in the wall.
Blog friends, I present to you.... A CLOTHES PIN PHOTO WALL!

Ok, so this may not be the first time you have heard about or seen this... but I was impressed with how this turned out that I thought I would share.
Here is what you'd need to create this:
- Clothes pins
- Paint
- A paint brush or sponge
- News paper
- 3M Command Picture Hanging Strips
- Level
- Tape measure
- Pencil
- Pictures!
*I don't have pictures for all of the steps and I'm sorry about that... but you are big kids and super smart so I'm sure you can figure it out!*
1. Using a level and a tape measure mark (with pencil) on the wall a little dot or X to show where you will put the clothes pin. I suggest spacing the marks about 5 to 6 inches (depending on picture size) apart so that the pictures do not over lap when you hang them.
2. After you have decided how many clothes pins you will be hanging on the wall take your paint, paint brush/sponge and number of clothes pins... lay them out on the news paper and paint them. *NOTE: Do not paint on the side that the 3M strip will go on. It will not stick as well and this also gives you a paint free surface to lay the pin to dry.

I suggest waiting 30 to 45 minutes for the clothes pins to dry, so grab a snack and watch a rerun of Friends or The Gilmore Girls that you have saved on your DVR.
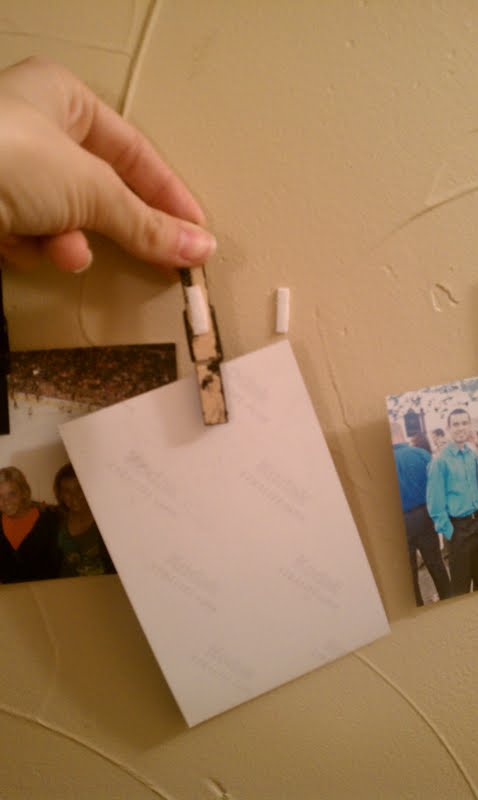
3. When the clothes pins have dried take 2 of the 3M strips and cut them so they become about 1/4 of an inch wide. Peel and stick a piece that you have just cut to each of the non-painted side of the clothes pin. Then stick another piece that you have cut to the spot you marked on the wall earlier.

4. Clip the photos that you have decided to display and clip them into the clothes pins. Then simply match each of them up to the 3M strip piece that you have already stick on the wall.
5. Give yourself a pat on the back for a job well done and enjoy your new, simple, very affordable (easily under $10- depending on the cost of getting your pics printed), self-made, "un-cluttered" photo wall!
After I hung my pics up I just thought the wall needed a little something more and I found the sign at Target (love that place!) for $15 and I think it works like a charm. For me, it gives the photo wall a title, a statement that the pictures I chose capture.
This idea could be easily adapt to other rooms in your house too. Like the kitchen- you could hang some pins to keep your shopping list, recipes or coupons on. A craft room would be another place that this might come in handy. Here you could display ideas torn from magazines or small swatches of fabric. A child's bedroom would be a fun place to have some pins too! Kids love to display art work that they have created and this would be a great way for them to do that and change it as often as they wanted. Plus, it is such a simple project that they could even help put it up!
HAPPY CRAFTING!

No comments:
Post a Comment